* Anime Bikini Girls with Guns
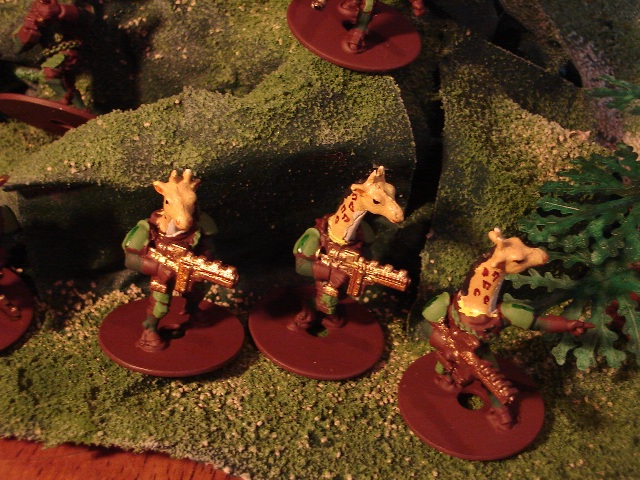
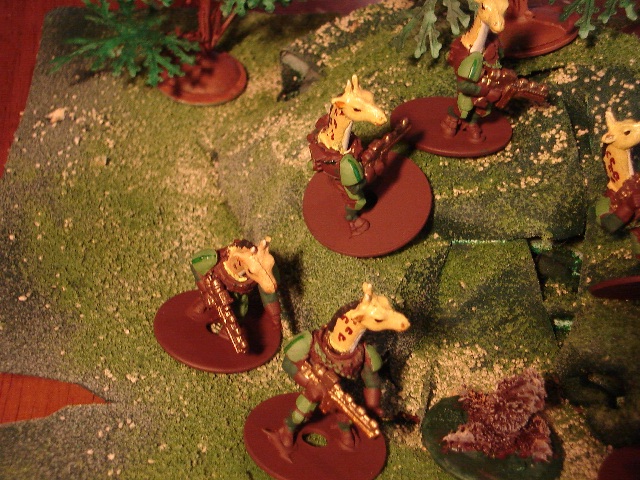
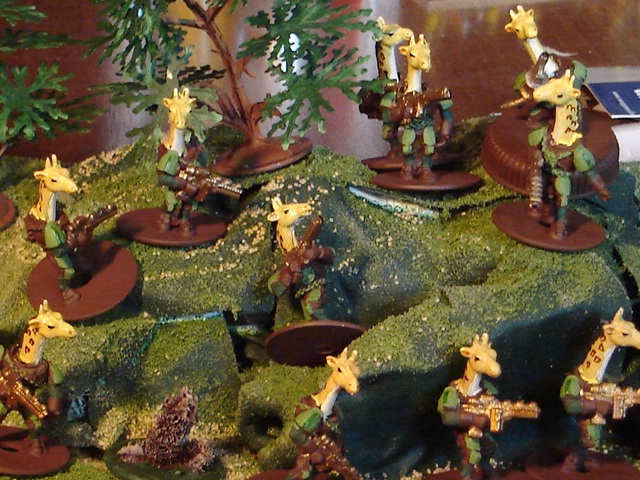
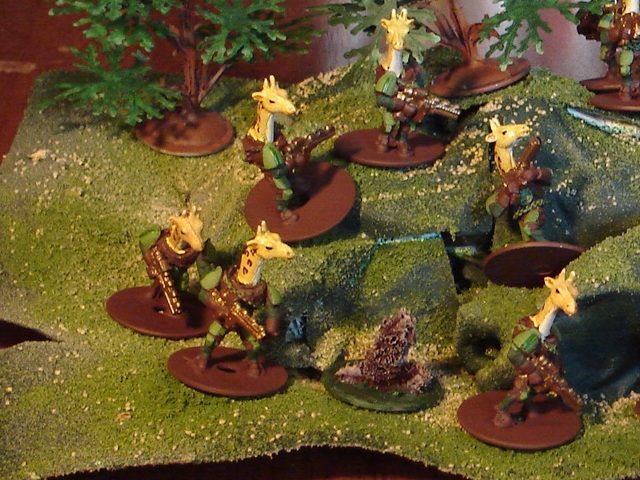
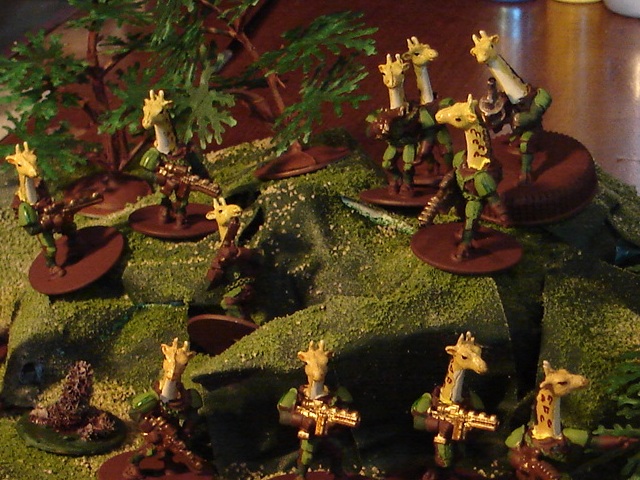
Not a tough one here, but a nice effect ... giraffe men!
The first thing is to get some cheap toystore giraffes. Try garage sale-ing. Or the "dollar store" or somesuch. Then you decaptiate them. If this turns out to be too much fun, seek psychiatric help.
Now you need some figures. These are made from Games Workshop and Wargeames Factory bits. The legs are GW Tau. The torsos are GW (chaos? I think) space marines. The arms and guns are Tim Barry's shocktroops. I get these barts BIN from Ebay's Hoard O' Bits, totalling less than USD 1.00 per figure.
I'm cheap.
The rest is assembly and painting. A key issue with painting is most cheap plastic toys are of a kind of plastic that doesn't paint well. The technique I use to get around that is to start with a coat of Rustoleum spray primer, be careful not to scratch during painting, and finish off with a sealing coat (I have several different options for that).
I went with brown, green, and gold as a colorscheme to give that suggestion of the African jungle. Plain, solid are a big thing for me. I love really well done probases, but when I am playing a game, have a hard time dealing with the cognitive dissonance of beautiful dirt bases on grassy plains and vice versa.
Once you seal it, the paint job will stand up to being scratched by razor sharp adamantium claws. Mostly because adamantium is not a real thing. More realistically, it does end up with decent resillience. I believe this works on the same principle that makes a fly not care that the amber it is trapped in isn't actually chemically bonding with its body.
eiπ

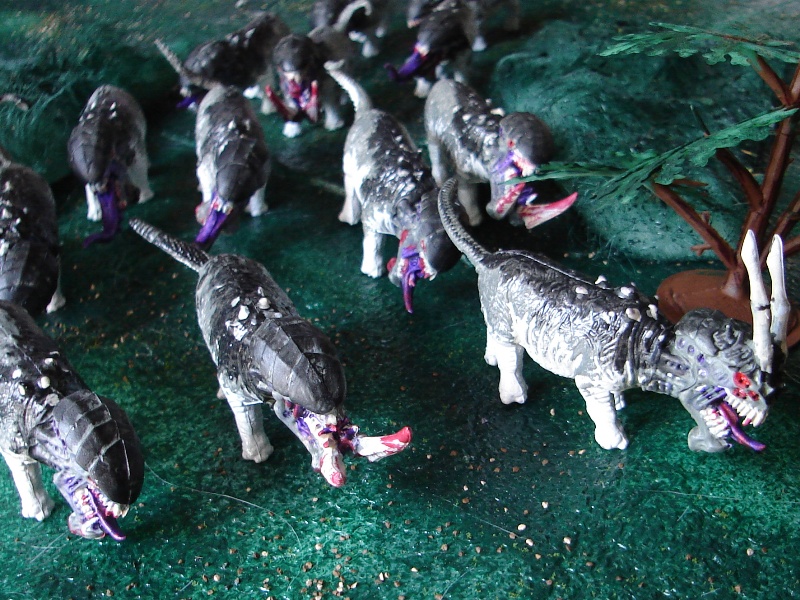
What could be sweeter than yet another recapitation? Like the Giraffe Men, these heads come from regular old "dollar store" toy rhinos. A hint for painting is after you glue the heads on (I use Loc Tite Household adhesive for that part), clean them with some isopropal alcohol, then prime them with Rustoleum spraypaint (or primer). The primer will hold through light to moderate handling, which should be enough to get your figure painted up. Once you are done, just seal it up and you shouldn't have a problem. I pick these guys up by the head frequently and haven't needed any touchups.
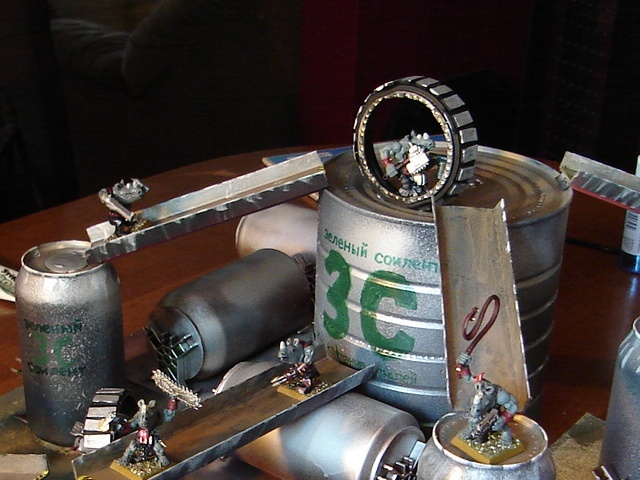
The bodies are GW savage orques and rider orques with 40K orque arms/weapons (Please forgive the spelling; I don't play any of the GW WH games) that I got from Hoard O' Bits. Again, all told less than USD 1.00 per figure for the parts.
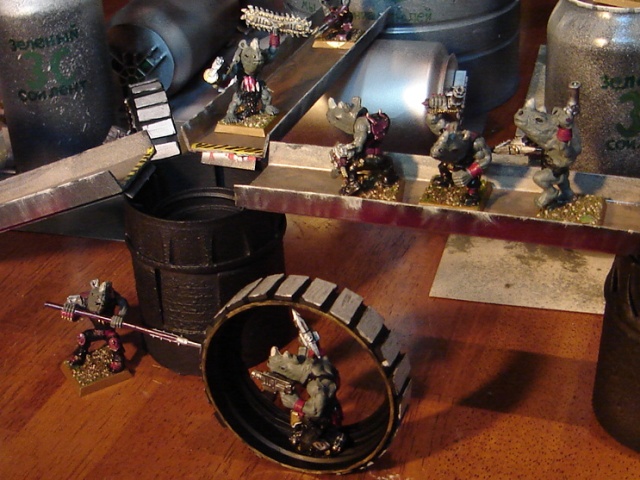
Now, for the RhinoWheels ... They are pretty simple. I started with a Paremesan cheese container lid and popped the flap off and the shaker holes out. That made a nice basic form. The seat for the riders is an old Mechwarrior Clix foot. The treads are just pieces of self-adhesive foam sheet, cut into little rectangles. Like the paint on the rhino heads, the adhesive holds them in place fine after you have sealed the whole piece. One trick for the treads is I skipped the two treads on the bottom. Did you notice? Probably not. By doing that the last treads on the wheel and the bottom of the wheel form a decently flat surface to balance the mini. I haven't had them fall over from table bumps, so I'm not worried about it. :)
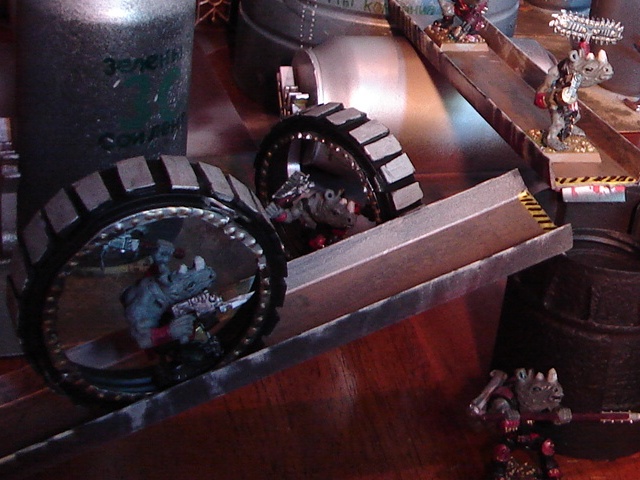
So ... what do you do with the rhino bodies? Well, i am too cheap to throw them out, so back to HoB for something GW calls a "carnifex". Or at least their heads.
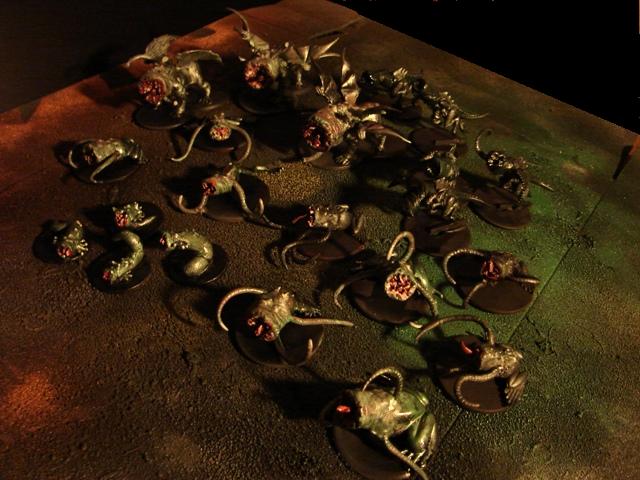
After publishing Caverns of the Cretaceous, a number of people (Hey! Three is a number.) asked about the models pictured in the section on evolutionary mistake monsters. They are available from "Hecho a Mano Manufacturing", that is, they were hand made, so if you want some, you would need to make them. Or inundate us with requests to buy them from us ... don't worry ... we'll make more. After all, this is such a fun and easy little project, we thought if they spurred a few people to inquire, a few more might enjoy a tutorial on them.
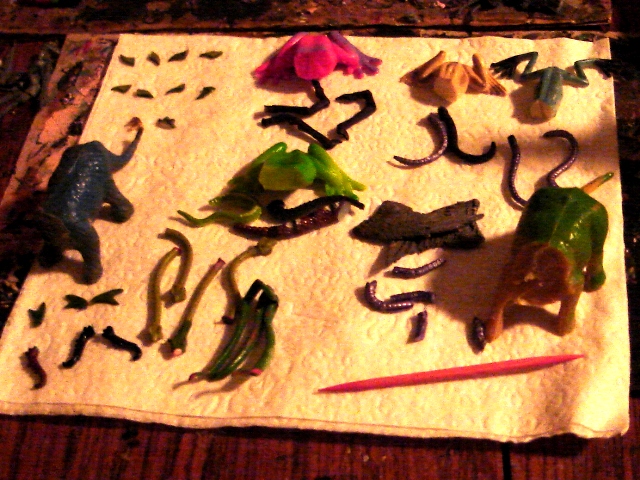
First off, these are H.P. Lovecraft style beasts from incomprehensible dimensions, so don't worry about making them all exactly the same. They shouldn't be. That leads to a great opportunity ... cleaning out the bits bins. About half of making these consists of gathering up the cast off pieces from other conversions and mushing them together. In the picture, you can see the parts being used.
First, we have a couple of bodies. On set is cheap plastic frog bodies. The heads and arms were removed to make forcs (orcs with frog heads and hands) and amphibimounts (In the top picture, you can see some converted GW Tyrannids - just getting the bodies as bits is great support for recapitations.), so the bodies are left over. The other set is some cheap plastic dinosaur bodies. The heads were removed to make six-legged mounts for Green Barsoomians. You never throw away stuff like that, either, do you?
For the miscelaneous bits we have some tentacles, like the ones above, but we also have some other stuff. notably, one guy gets spider legs. This is because we had some break off during a gaming session, but didn't want to look through ~100 spiders to find the lame ones. It's a horde. It'll be fine with a few seven-leggers. The tentacles proper are actually not proper tentacles; they are little rubber snake bodies. The heads are useful for many, many projects. The bodies, then make good tentacles.
There are a few small bits in the back left for the worm style guys. I only had enough of those gill things (actually frog hands) for one more worm, go a grabbed some fins I had to shave off another model. I think those will work fine.
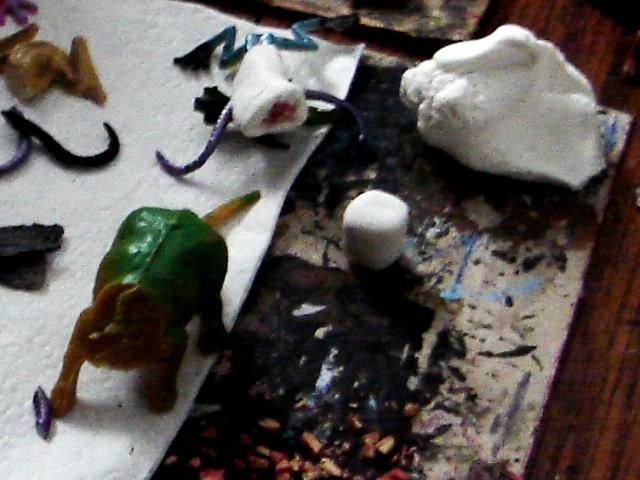
Well, not real marshmallows. But the "heads" are little pieces of Model Magic clay that look like little marshmallows. Yes. Model Magic. This tutorial doesn't seek to assert Crayola MM as the ultimate modeling substance. However, as a cheap material to make large volumes of mostly shapless mass, it excels. (BTW, tin foil ball + thin layer of MM wrapper = cheap & easy boulders!). I use a little adhesive on the parts to make the clay stick while drying. I like to go for radial symmetry and asymetrical designs; they seem to be more primal.
The next bit is using the pink toothpick. That's for the teeth. Basically, I just chop it up into bits with a pair of nippers, which yields a bunch of small, irregular hard pieces. The mouth is then made by cutting a hole in the end of the marshmallow and then shoving toothpick bits into the surface.
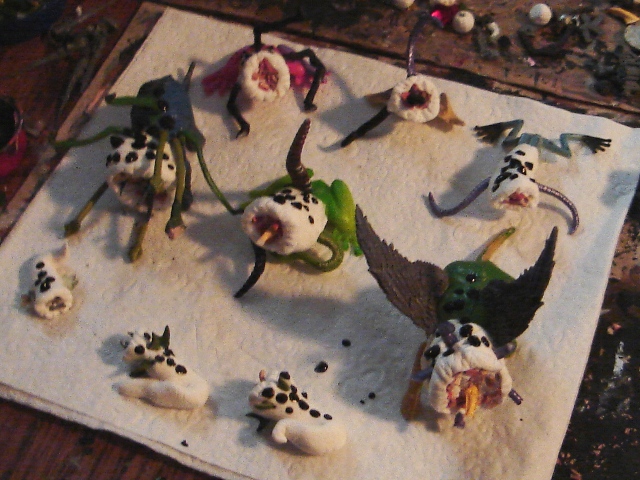
As a finshing touch, I like to put some lumps on the tops of the models - organic bumpy things. These are done with "puff paint" - a liquid latex sold in most craft stores, designed for writing and drawing raised patterns on clothing. This is also the stuff I use for putting rivets on terrain. It's quick, easy to apply, and cheap. And better than rivets, these bumps aren't even supposted to be relatively uniform or in line.
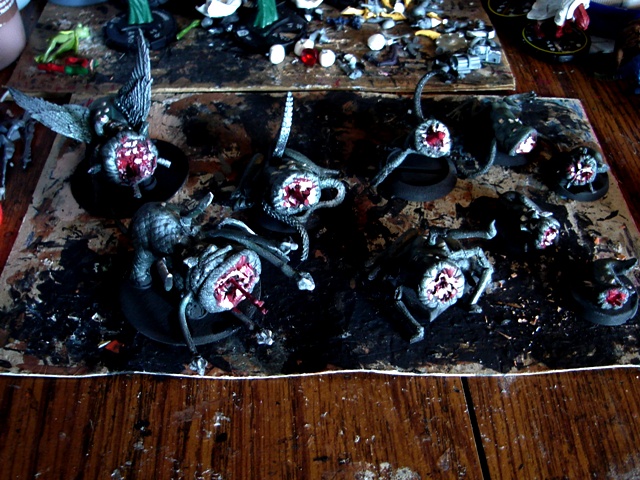
We've talked a lot about variety and mutability in this project. Painting the pieces is a spot where we will advocate a little consistency. Not a lot, just a little. A relatively uniform paint scheme will help give these guys the appearance of a cohesive force ... of having been sent by something ... coming from somewhere. The base color we use is a mix of metallic silver with forrest green and a little black. Mixing regular colors with a metallic (especially silver) gives the unearthly effect, and if you don't mix too thoroughly, you get automatic striations and variation in the skin. Don't sweat an exact match with the hand mixed color. We said a little consistency, not a color wheel regimen. The internals (that is looking inside the maw) get a dark red and the teeth are lightly hit with an off white (called goosefeather ... no really). Don't spend too much time agonizing over every tooth. Just hit the area with a drybrushing a couple of times and leave it be. The hit and miss on a background of deep red gives a disturbing organic feel to it as opposed to a regulated set of "perfect" teeth.
Of course, you should feel free to paint your own minis with pyschadelic paisley patterns in day glo colors if you want.