Irrational Number Line Games, LLC
home stuff-to-buy idea archive about-us contact
Death May Die Exclusive
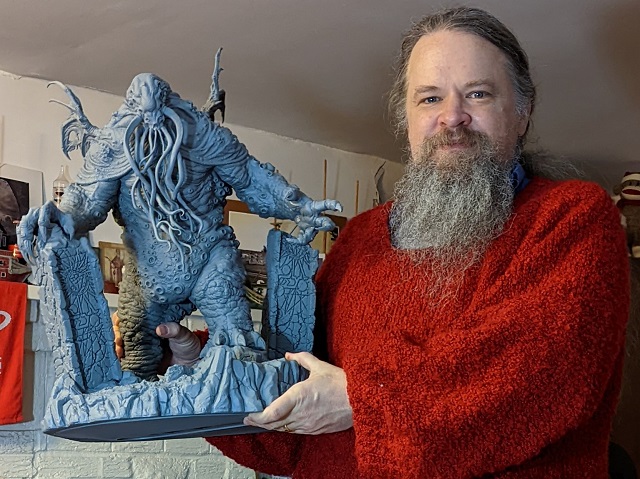 So, SWMBO and DOM got me one mini for Christmas.
I missed my Spring opportunity to prime him outside for ... reasons. So after it was too hot in the summer and before it becomes too cold in the winter, I got him primed.
 Here he is. I used camo green for the body, camo khaki for the wings and tentacles,
and gloss green for the base. The camo colours will form the base colour for the mini
so I can finish him with a few layers of simple dry brushing.
Here he is. I used camo green for the body, camo khaki for the wings and tentacles,
and gloss green for the base. The camo colours will form the base colour for the mini
so I can finish him with a few layers of simple dry brushing.
For all the dry brushing, I will be using lighter colours and brushing down. This will create a lighting effect. But applying more strokes in some areas and not even doing any for the underside, it will create a nice shadowing effect with not a lot of fiddly work.
 The pillars were primed in flat camo grey, but I went back and blocked in clours for
them. Black for most of it. When I dry brush grey on top, it will leave dark crevices
and depending on how hard and how many dry brush coats, I will get varying shades of
grey.
The pillars were primed in flat camo grey, but I went back and blocked in clours for
them. Black for most of it. When I dry brush grey on top, it will leave dark crevices
and depending on how hard and how many dry brush coats, I will get varying shades of
grey.
And you can see the dayglo colours for the symbols. This will leave those colours in the cracks, to look glowy occult energy.
 The base is gloss green, and I hit the deep cracks with some black, but not enough to
fully cover. I am going for the slimy effect by drybrushing dirt and stone colours over
top of the base.
The base is gloss green, and I hit the deep cracks with some black, but not enough to
fully cover. I am going for the slimy effect by drybrushing dirt and stone colours over
top of the base.
 With the wings, I used a couple layers of dark brown wash to finish them off. Simple,
but the really great detail in the mini allows the technique to provide a lot of
character for a little work.
With the wings, I used a couple layers of dark brown wash to finish them off. Simple,
but the really great detail in the mini allows the technique to provide a lot of
character for a little work.
 The pock marks got brown, then red. I started from the top of the hole and pulled the
brush down. A little got on the lower rim, which is fine, giving a sense of gravity.
The pock marks got brown, then red. I started from the top of the hole and pulled the
brush down. A little got on the lower rim, which is fine, giving a sense of gravity.
Most of the rims of the pockmarks and the folds in the skin get highlighted with drybrushing two shades of olive green in three coats each.
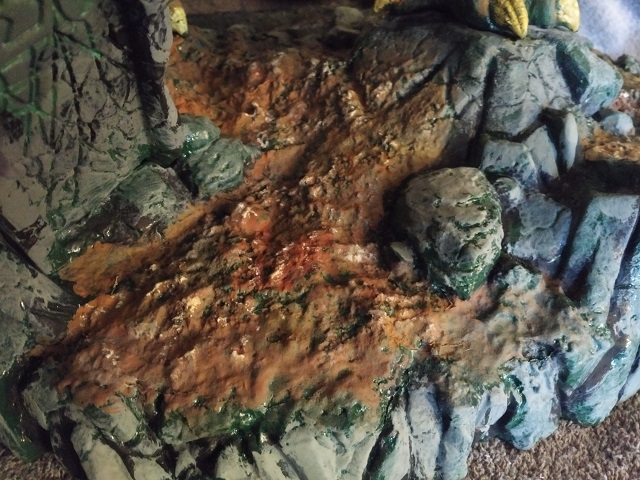 Here you can see the mix of rock and dirt over the base coat. The ground uses the same
brown and red in the pock marks, but in the opposite proportions (more brown than red
on the ground). This gives some unity to the piece without too much sameness. The
dirt got some lighter drybrushing with white mixed in. I normally do a white very light
drybrush on stones, but I left it out this time to subdue the stones on the base. They
are lower, near the water AND I don't want to pull attention away from the columns.
Here you can see the mix of rock and dirt over the base coat. The ground uses the same
brown and red in the pock marks, but in the opposite proportions (more brown than red
on the ground). This gives some unity to the piece without too much sameness. The
dirt got some lighter drybrushing with white mixed in. I normally do a white very light
drybrush on stones, but I left it out this time to subdue the stones on the base. They
are lower, near the water AND I don't want to pull attention away from the columns.
 The back of the mini base has the last steps out of the water. I used a dark blue and
a different shade of black to make a murky effect, then covered it with a few coats of
gloss sealant. The crests got more gloss than the troughs.
The back of the mini base has the last steps out of the water. I used a dark blue and
a different shade of black to make a murky effect, then covered it with a few coats of
gloss sealant. The crests got more gloss than the troughs.
 Here is the final of the columns. It doesn't look as neat and clean as I have seen
some painters doing such details (which are way smaller than these). However, I feel
this looks more organic and unearthly. And ...
Here is the final of the columns. It doesn't look as neat and clean as I have seen
some painters doing such details (which are way smaller than these). However, I feel
this looks more organic and unearthly. And ...
 It really shines under uv light.
A bonus was the day glo colours "charge" like photoluminescent paint under the uv. So when you pull the light away, the glow for a bit. I'm going to get some uv lights and charge them for a couple house before playing.
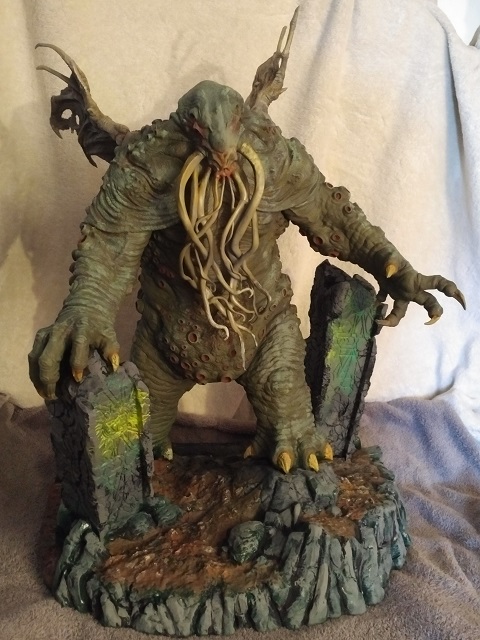 And here is the mini all done. You may notice that, against advice, I did not do the
nails in Hello Kitty pink.
And here is the mini all done. You may notice that, against advice, I did not do the
nails in Hello Kitty pink.
And while I call this a "mini", it is actually the board for its own scenario of the Death May Die game. So we get to play the scenario now, since you can't play with unpainted minis ... terrain ... Cthulhus.