Irrational Number Line Games, LLC
free-stuff stuff-to-buy about-us home contact
Science Fiction Terrain and Scenice

So Easter is around the corner. Well, as I write this, but not necessarily as you read it. See? The Internet lets you travel into the past. Anyway, There are tons of form molded plastic containers available right now for all kinds of candy, cookies, and various snacks. Except Marshmallow Peeps. They're disgusting and if you eat them you are not allowed to read farther. I mean it.
Anyway (again), here are a few containers just ready to be converted into some nice terrain with a modicum of effort. We have two different types of Reeses peanut butter egg thing, a cookie container, a cupcake one, and some packing thing from something my wife mail ordered (on the left). Remember, it's "Reuse, Repurpose, Recycle", in that order. The Greens want you to make this terrain.

 After selcting the pieces and trimming them, the next step is to decide what parts you
want to remain transparent. Then cover those areas with Scotch tape. The big dome on
the giant egg container was a no brainer. The cookie container (upper right) is going
to be a generator, so I taped off the top pieces, that way I can put one of those little
battery powered flashy Christmas votives in it and get a flashy effect. The ridges on
the cupcake container (lower right) just scream skylights, so this will be a generic
industrial building. The mini egg container has windows taped over. You will see
what this means later. The ones on the left will just be platform type things, so
they don't get anything taped off.
After selcting the pieces and trimming them, the next step is to decide what parts you
want to remain transparent. Then cover those areas with Scotch tape. The big dome on
the giant egg container was a no brainer. The cookie container (upper right) is going
to be a generator, so I taped off the top pieces, that way I can put one of those little
battery powered flashy Christmas votives in it and get a flashy effect. The ridges on
the cupcake container (lower right) just scream skylights, so this will be a generic
industrial building. The mini egg container has windows taped over. You will see
what this means later. The ones on the left will just be platform type things, so
they don't get anything taped off.
I used self adhesive foam shapes to add some detail and hide some of the markings (like the recycle symbol). There are also a couple of pieces of plastic canvas - "granny grating" - to make, well, grating. I also added some rivets with puff paint (liquid latex used to decorate t-shirts) on areas that will be metal. Close ups of the detailing below. I used the pictures after priming with Krylon Fusion spraypaint; they show the details better without the confusing look of multiple materials.


After priming, I went with the metallic silver paint for the metal parts. I let the paint slop over the border of the metal areas I wanted. The next step is to paint concrete pieces. The paint for that will have good edges and cover the metallic slop. As well as being faster, this also ensures I get metallic paint all the way down to the border between metal and concrete. I find that when I try to paint to both sides of a border precisely, I leave gaps. The concrete paint is just grey paint with some sand in it for texture. I add a little PVA (cow glue) to it to help it stay. Because I seal all my terrain pieces, I don't have problems with sand rubbing off.
The detailing really helps the pieces pop, and isn't very difficult. The hazard stripes are painted yellow, and then striped with a black Sharpie. I use a stamp for the letters. It's a little hard to tell, but I ran green Sharpie over the clear areas of the generator to make a translucent green, which makes a nice effect with a flashing light under it. The cryo chamber is my fave here. I printed pictures of cracked ice and drew the shadow of people on them, then taped them to the underside of the window. The floor in the domed section is just a printed pattern.

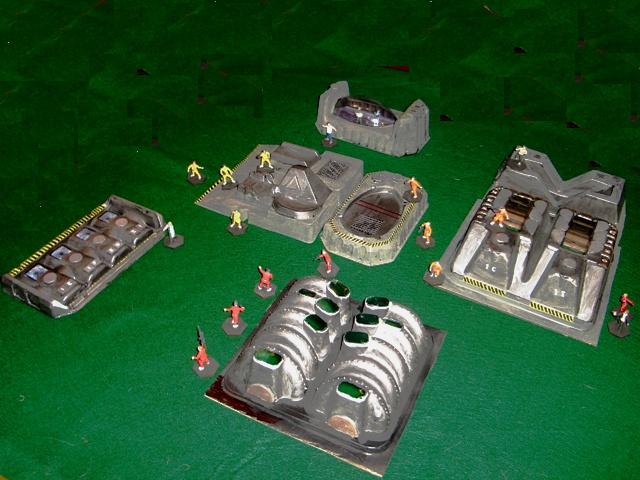 Here they are in action! Dr. Meh and Ivanna Humpalot are inside the domed control room
(I didn't fasten the floor to the piece, so you can put figures inside), while his
minions search the compound for James Weld and his ingenue companion, Sligh Fochs.
Here they are in action! Dr. Meh and Ivanna Humpalot are inside the domed control room
(I didn't fasten the floor to the piece, so you can put figures inside), while his
minions search the compound for James Weld and his ingenue companion, Sligh Fochs.