Irrational Number Line Games, LLC
home forum stuff-to-buy idea archive about-us contact
Classic Flying Saucer, Crashed
Once again back to the classics. Also to the deep archive. This is a project I did a few years back, and pulled back out because I have been watching the X-Files in rerun on Netflix. It is timeless and flexible, as well as being a fairly big piece of terrain (covering about 1'x1' of the tabletop. It's also very easy and cheap, but not lacking in detail. So put on your tin foil hats ... we're making a flying saucer.
And crashing it!
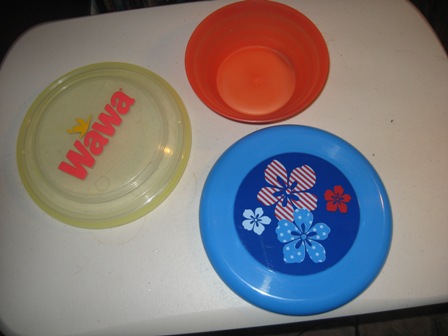 Eschewing unobtainium and other materials traditionally associated with
faster than light intergalactic travel, we have instead chosen other
materials traditionally associated with backyard flight. Frisbees!
And a dog bowl. If you spend more than $3 on this, you have spent too
much. You are likely to have at least one of these things as swag from
some company's promotion or other.
Eschewing unobtainium and other materials traditionally associated with
faster than light intergalactic travel, we have instead chosen other
materials traditionally associated with backyard flight. Frisbees!
And a dog bowl. If you spend more than $3 on this, you have spent too
much. You are likely to have at least one of these things as swag from
some company's promotion or other.
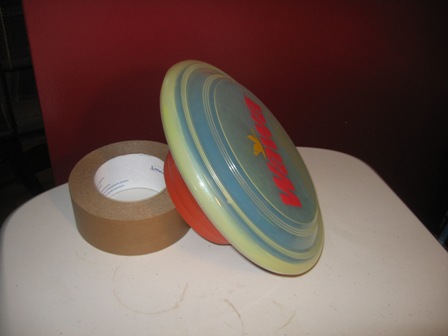 Without gluing, figure out how the piceces go together. Here I have one
firsbee inside the other to make a "soild" disk and the bowl underneath,
to be some type of power assembly or other. Fitting one inside the other
is why you don't want two of the same frisbee. This model is pretty basic,
so you could add other types of disc, plate, bowl, or cup fairly easily.
Without gluing, figure out how the piceces go together. Here I have one
firsbee inside the other to make a "soild" disk and the bowl underneath,
to be some type of power assembly or other. Fitting one inside the other
is why you don't want two of the same frisbee. This model is pretty basic,
so you could add other types of disc, plate, bowl, or cup fairly easily.
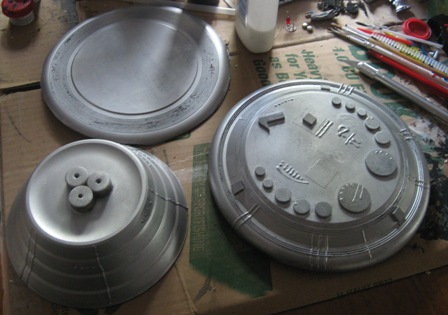 You could also throw on some extra decorations. These are just self-adhesive
foam bits and a little bit of liquid latex. Again, this is a big piece (9"
diameter of the big disc), so you need some detail. I don't recommend going
overboard. Small bits like this give a good retro saucer feel and take only
a few minutes to apply. In a more steampunk vein, you could probabaly add
lots and lots of bits and bobs. Maybe even 10,000 precision placed rivets.
You could also throw on some extra decorations. These are just self-adhesive
foam bits and a little bit of liquid latex. Again, this is a big piece (9"
diameter of the big disc), so you need some detail. I don't recommend going
overboard. Small bits like this give a good retro saucer feel and take only
a few minutes to apply. In a more steampunk vein, you could probabaly add
lots and lots of bits and bobs. Maybe even 10,000 precision placed rivets.
Oh, yeah. I spray painted it silver. Didja notice?
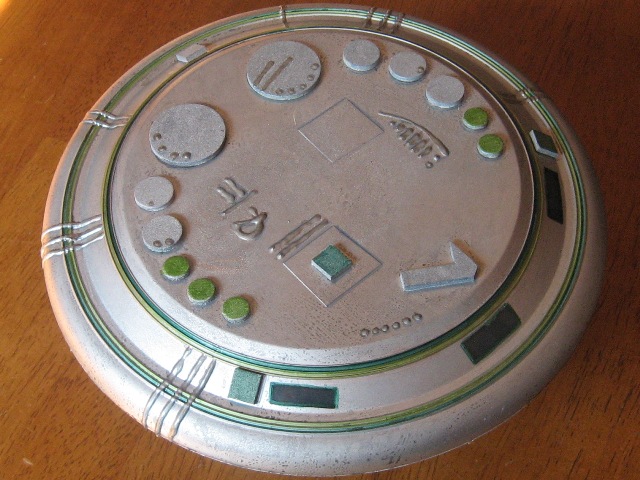 I lover silver paint because ink gives such a good effect on it. The windows
are another one of my faves. Since the top disc was translucent, I put a few
pices of tape down before I spray painted. When they are peeled off, they
leave translucent plastic windows. If you stick a cheap flicker light inside
the piece, you will get flashing light inside the windows.
I lover silver paint because ink gives such a good effect on it. The windows
are another one of my faves. Since the top disc was translucent, I put a few
pices of tape down before I spray painted. When they are peeled off, they
leave translucent plastic windows. If you stick a cheap flicker light inside
the piece, you will get flashing light inside the windows.
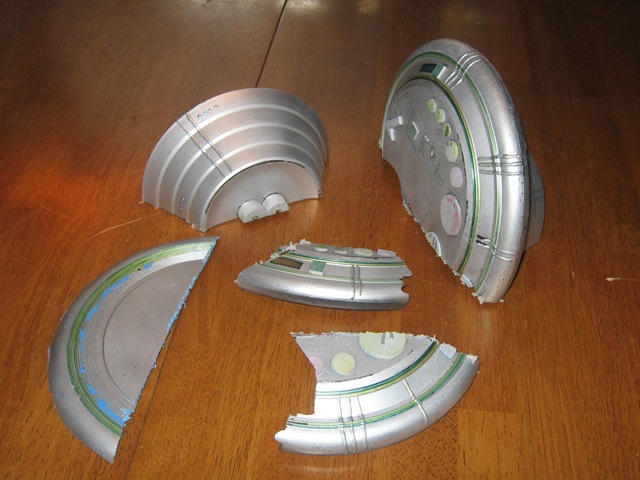 I kind of misled you up front. We aren't going to make a flying saucer
and then break it. The secret to this piece is to make the individual sections,
and then break it apart before you assemble them. I broke the saucer with
my bare hands and then cut the bowl with a coping saw.
I kind of misled you up front. We aren't going to make a flying saucer
and then break it. The secret to this piece is to make the individual sections,
and then break it apart before you assemble them. I broke the saucer with
my bare hands and then cut the bowl with a coping saw.
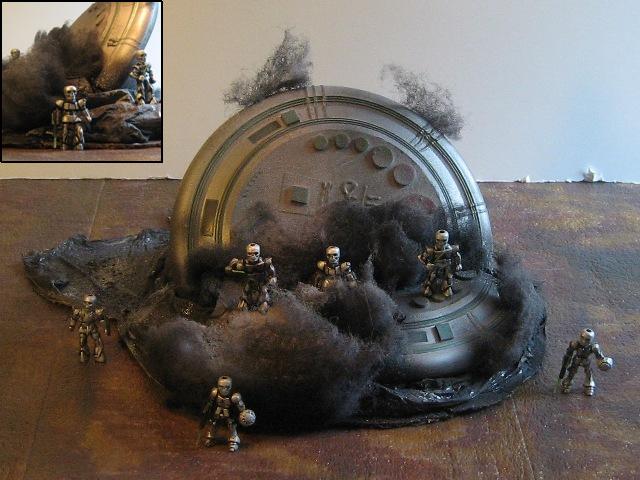
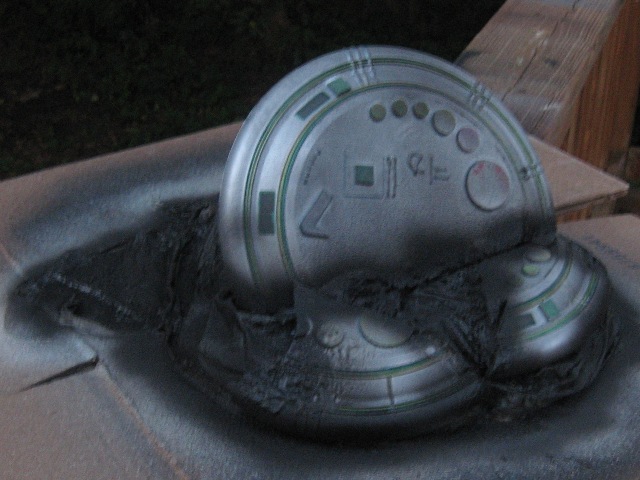
 Enter the scorched earth. I made a random shape out of cardboard, then glued
some plastic bags to it and finally spray painted it black. Once that mess
dried, I glued down the ship pieces.
Enter the scorched earth. I made a random shape out of cardboard, then glued
some plastic bags to it and finally spray painted it black. Once that mess
dried, I glued down the ship pieces.
I hit the seams of the ship and dirt with a bit more black spraypaint to
spread the charring effect.
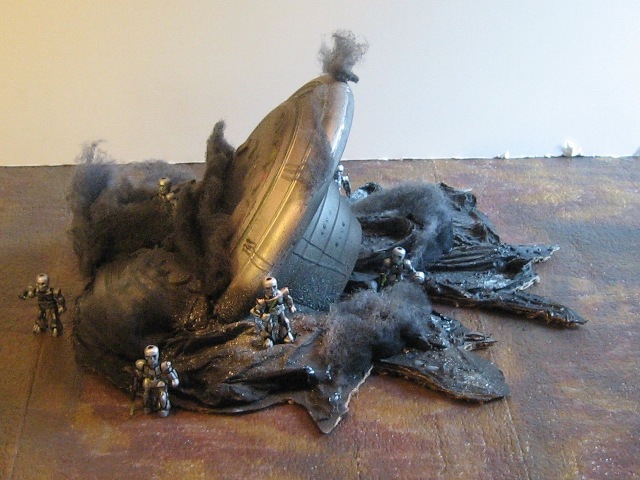 The last bit is to add some stretched out cotton balls that had been
painted black to create some smoke. I think it adds a lot to the look
with a simple technique. It also adds some more complex terrain (you can
shoot or walk through it, but you can't see (or often, electronically
detect) things through it).
The last bit is to add some stretched out cotton balls that had been
painted black to create some smoke. I think it adds a lot to the look
with a simple technique. It also adds some more complex terrain (you can
shoot or walk through it, but you can't see (or often, electronically
detect) things through it).
The chibi necrons are included to show how you can get a lot of interesting
play out of a simple piece like this. Lots of options for reduced movement
in the ash, obstruction from the smoke. Multiple layers of elevation. A
tough to navigate slope. And, of course, lots of stuff to hide behind.