Irrational Number Line Games, LLC
home stuff-to-buy idea archive about-us contact
Die Cast Vehicles
 I usually walk past the die cast cars at the impluse buy stand near
the check out at the grocery store. Mostly because I have quite a few
and don't just want to pick up a bunch I won't use.
I usually walk past the die cast cars at the impluse buy stand near
the check out at the grocery store. Mostly because I have quite a few
and don't just want to pick up a bunch I won't use.
But the camper caught my eye. I have a Winnebago (transformed into a scifi command vehicle), but not a camper. Good for height variation in parking lots, and lots of use in postapoc scenarios. All around, a useful vehicle. That lead to a few more purchases, too. But more on those later ...
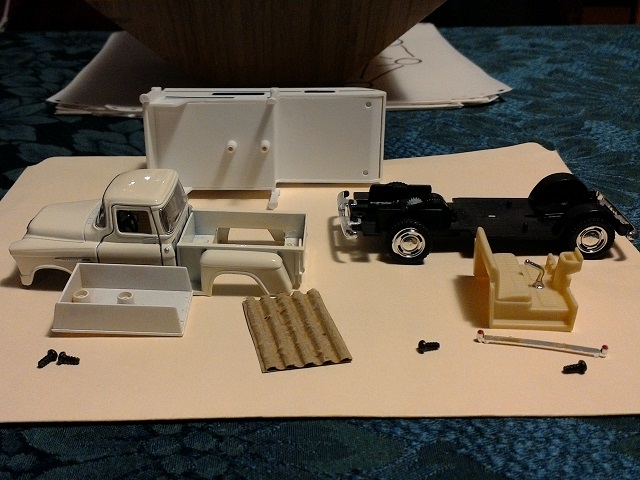 First, nothing "improves" a vehicle like taking it apart. Since I
already have a number of these type, I knew that it would come apart
easily with two screws.
First, nothing "improves" a vehicle like taking it apart. Since I
already have a number of these type, I knew that it would come apart
easily with two screws.
The goals are: (1) make the camper part removable so the vehicle can double as a plain truck (and maybe the camper part can stand alone as a portable building, (2) let me hide some figures "inside" the camper part.
Challenge one: The truck has no actual bed. No problem. Enter the small slip of corrugated cardboard.
Challenge two: Both the camper and the sleeve that holds it is place have a floor. And they are linked together with the stabilizers. This one made goal require a lot of cutting (no problem) that would risk destroying the camper part. Problem. OK, skip goal 2.
 That said, she goes back together fine, and the sleeve and the camper get
glued together, and the cardboard (after some silver paint) glues into
the bed.
That said, she goes back together fine, and the sleeve and the camper get
glued together, and the cardboard (after some silver paint) glues into
the bed.
If you look back at the last picture, you can see a gap in the walls of the truck bed. I missed that until I put the bed in. But I didn't want the gap, so I added some duct tape under the chassis to fill in.
Now the camper lifts in and out to make three variants.
 Also got a short bus. It's a nice addition to my
other busses.
And it's just a nice piece. But a little too clean and nice, especially
for a working vehicle.
Also got a short bus. It's a nice addition to my
other busses.
And it's just a nice piece. But a little too clean and nice, especially
for a working vehicle.
 My main push with this was to hit the corners in the body with the bronze
paint pen, then trace the paint with my finger before it dries. That
creates a nice smut/rust effect for grunging up vehicles.
My main push with this was to hit the corners in the body with the bronze
paint pen, then trace the paint with my finger before it dries. That
creates a nice smut/rust effect for grunging up vehicles.
The flashers were all black on the original paint job, so I hit them with a silver paint pen, then orange regular (ink) pens. Ink over silver paint (from a paint pen or not) gives a good plastic coated light effect.
The last bit was to drive black ink from the regular ball point pen into the deep grooves of the vehicle. This emphasizes the gaps. Normally, I would prime black and paint over in a way to leave shadows and gaps as appropriate. But since this came painted with the bus yellow filling the gaps (like in the doors), I just touched it up a bit.
 The last two were these two trucks. I have always liked the line of
this style of truck. And these ones came pre-dirty. Work trucks.
The last two were these two trucks. I have always liked the line of
this style of truck. And these ones came pre-dirty. Work trucks.
 I didn't like the solid light brown on the wheels and the bumpers, so I
gave this one a little touch up. there and dirtied the bed.
I didn't like the solid light brown on the wheels and the bumpers, so I
gave this one a little touch up. there and dirtied the bed.
The 28mm figures show that these vehicles are a little large for my primary scale. But as with buildings, I think that helps during play. The size helps fit figures that are on bases inside and on top. It also covers some of the artificiality of using figures. Yes, a figure standing behind the cab would likely have their head exposed. Then again, a person behind the cab getting shot at would likely duck.
 Contrary to everything I have said so far, I cleaned up the other truck.
It just felt like it needed to be a nice green. And, honestly, painting
up vehicles like this is fun.
Contrary to everything I have said so far, I cleaned up the other truck.
It just felt like it needed to be a nice green. And, honestly, painting
up vehicles like this is fun.