Irrational Number Line Games, LLC
home stuff-to-buy idea archive about-us contact
World War I Trench Diorama
 I started with a foam square, cut it in half and glued it together end-to-end
to make a rectangle. Then I cut a trench 2/3 of the way down and an angled one to meet it. This is the trench.
I started with a foam square, cut it in half and glued it together end-to-end
to make a rectangle. Then I cut a trench 2/3 of the way down and an angled one to meet it. This is the trench.
 A nice black priming shows the general form of the trench. There's a good lead
into No Man's Land at the top of the trench.
A nice black priming shows the general form of the trench. There's a good lead
into No Man's Land at the top of the trench.
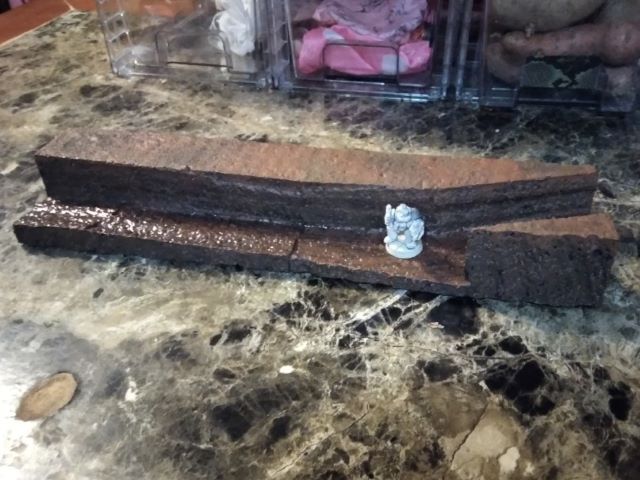 The same base brown (nutmeg) for all of this, but different mixes. The top
gets sand mixed in and a light color dry brush on top. The sides of the
trench are just the regular brown. The bottom of the trench gets a wash of
black on top and also gloss sealant. Nice and muddy.
The same base brown (nutmeg) for all of this, but different mixes. The top
gets sand mixed in and a light color dry brush on top. The sides of the
trench are just the regular brown. The bottom of the trench gets a wash of
black on top and also gloss sealant. Nice and muddy.
 For the No Man's Land top part I am going to add some barbed wire and a
couple of
chevaux-de-frise.
Here is some thin craft wire (barbed wire), wood chopstick pieces (posts),
and bits of sprue (tank obstacles). Paint, glue, and attach.
For the No Man's Land top part I am going to add some barbed wire and a
couple of
chevaux-de-frise.
Here is some thin craft wire (barbed wire), wood chopstick pieces (posts),
and bits of sprue (tank obstacles). Paint, glue, and attach.
 Added to the top, they give some character to the piece. I've also taken
some scrap wood bits and made planks to run the trench. They will get a black
wash to finish up.
Added to the top, they give some character to the piece. I've also taken
some scrap wood bits and made planks to run the trench. They will get a black
wash to finish up.
 End view. Not that it will get a lot of end viewing on a shelf, but it's
nice to know that works.
End view. Not that it will get a lot of end viewing on a shelf, but it's
nice to know that works.
 I found a background, and did converted it to sepia tone, then printed
it as a backdrop. I gave the piece to my daughter, who assembled it, put
it on a shelf, and added her
Bad Squidoo Pigeoneers ... and a surprise to me, a couple of WWI aircraft.
I found a background, and did converted it to sepia tone, then printed
it as a backdrop. I gave the piece to my daughter, who assembled it, put
it on a shelf, and added her
Bad Squidoo Pigeoneers ... and a surprise to me, a couple of WWI aircraft.
Here is a larger version of the shelf in situ.