Irrational Number Line Games, LLC
free-stuff stuff-to-buy about-us home contact
Junkyard
This is a nice easy piece of terrain that shows what you can do if you just put in a little time. The steps for making the ruined cars are very easy to follow, and with a little elbow grease, you can have as big a junkyard as you want.
Car Molds
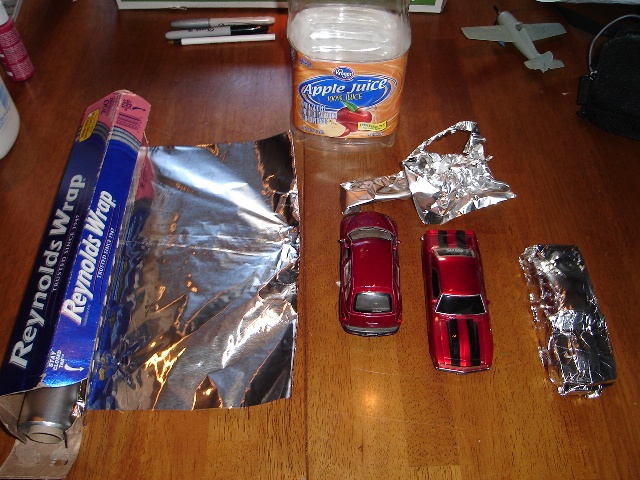
The big "secret" for this piece is making lots of wrecked cars. The technique is simple. Find a car or two of a reasonable size for your minis. Wrap the car in aluminum foil. Two layers. Pull the molded piece of foil off the car. Repeat.
Aluminum Foil? Really?
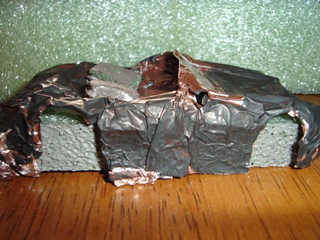
Yes, really, but not just that. After you make the molds and distort them as you see fit, you should hit them with a base coat of spray adhesive, then a coat of primer. This will make them a bit more rigid. But we're not done yet. Next you need a coat of colored paint (and possibly a nice dirty brown wash for grime) and a layer of spray sealant (We used matte sealant since these aren't shiny, new cars). Now the wreck should be fairly rigid. However, to make it stand up to regular gaming use, we also strengthen them with some foam blocks and supports underneath.
You may also notice the blocks of cars that have gone through the compressor. These are made when we pull off a foil mold, and it just mushes up or tears.
Concrete Slabs
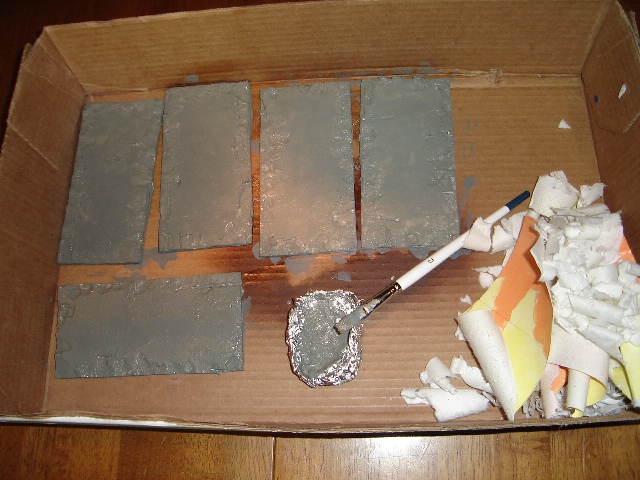
It is important to base your piles of cars, because the center of gravity is too high, otherwise. As soon as the first figure gets placed in a corner, the whole thing will fall over. Fortuntately, this is a junkyard. We took some foamcore, roughed up the edges, and painted it grey. That should do nicely.
Rinse and Repeat
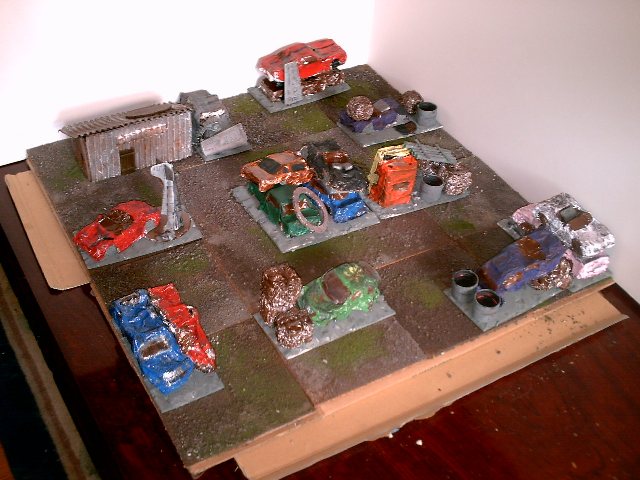
After a few iterations, you should have a nice junkpile going. Since we are using foil molds for the cars, it is very easy to get different looking wrecks with a little stretch and smush before the painting and blocking.

Miscelanea

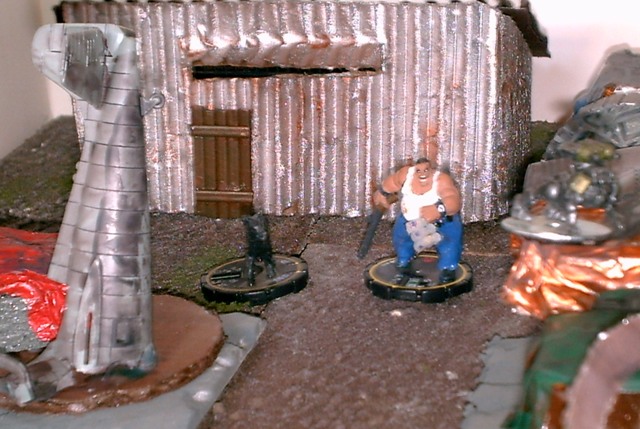
You need some miscelanea in a junkyard. We've thrown in a few bottlecap barrels, the pieces of an old airplane model that got broken (see ... it really is a junkyard!) and a corrugated tin shack in the back. The shack is just carboard around one of the car bases. Roof option. Well, you've seen enough of the junkyard ... now git!
No, you go water the plants!
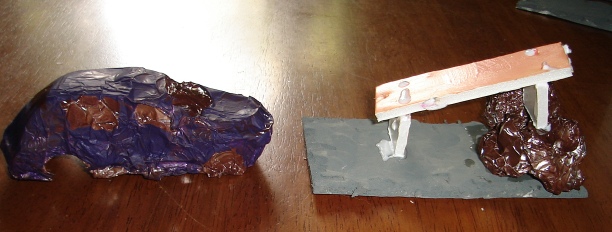
A question was posted on TMP about the feasability of using some GW pieces to make vicious plants. We took that as a challenge, or task, or excuse to buy more minis and waste time painting them.
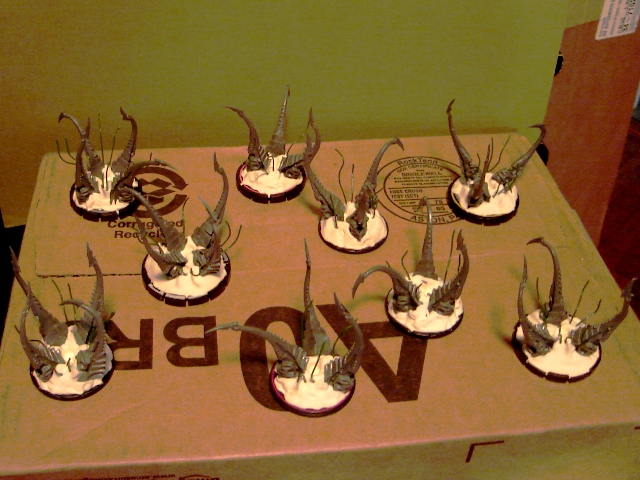
This may be more primitive, but it was just as fun and actually turned out
well enough for us to want to show it around. Very simple, these are just the GW
torsos mentioned in the TMP post smooshed to old HeroClix figure bases with
Crayola
Model Magic clay, then painted up.
I always put some adhesive on what I want the clay to stick to. It dries soft, but firm enough, but it doesn't adhere. After sticking the torso in the muck, I used a pencil to open up a hole in the middle, then tamped the outside back against the tentacles. My original thought was to put giant flourescent colored flower petals around the outside of the business end of the predatory plants, but that just wasn't working. So instead, I just popped a few pieces of floral wire in the clay to add some additional biological miscelanea to the pieces.
Painting these guys up was also a happy experiment. Normally, I prime figures
with Krylon
indoor-outdoor paint in a color that I want to be an
undertone of the whole piece. About halfway through, I ran out of the green I
was using. So I went back to grab black as a catchall primer coat. Well, I saw
the metallic blue there, and though it would be nicely related to green, so I
went with that instead. The mix of the two colors turned out so nice, I decided
just to spray paint the pieces in toto. All it took was a splurtz of red in the
centers then a dusting of khaki from far away to give these guys a nice look. I
went ahead and finished them with a double coat of clear sealant. When you apply
(Krylon?) spray sealant too thick, it becomes like a translucent white haze over
the piece. This usually ruins figures, but sometimes it can be used to even out
and neutralize a piece. I think it ended up with a decent effect.
I only did a minimal bit of painting after the spraypaint. The tips of the tentacles got Apple Barrel flourescent yellow paint. This stuff is horrible for regular painting, since, no matter what I put under it as a base or primer, it doesn't adhere well and barely covers after multiple coats. That, however, makes it really good for making a dayglo color flim like coat. Like, say, pollen?

At the Hoard of Bits price, this was $10 of parts for nine figures. That's a little above my regular "one buck a figure" limit for being cheap. If I had stayed with 3 torsos per plant, it would have hit right at one dollar. But I think having the three "big" ones with four tentacles was worth it.